
Setting up Multifactor Authentication the right way – Part three: Configuring a break the glass account
Welcome to the third and final part of the series ‘Setting up Multifactor Authentication the right way’. In part one, we have enabled MFA and in part two we disabled legacy authentication.
If you have followed these steps, your organization will now use multifactor authentication. But like all Microsoft products, it is possible that the MFA cloud service will have failure and will be unavailable. If you don’t have the necessary precautions it is possible you loose access to your entire environment during an outage.
Some will argue that excluding trusted locations from the MFA policy will also ensure that you have access to your environment during an outage. But don’t take this for granted, because it is possible these kind of exclusions will fail when the MFA service is down. Microsoft has some official documentation about these kind of Break the Glass Account. Microsoft recommends to exclude at least one account fromconditional access and have the account use a different form of multifactor authentication. My clients typically don’t have access to another MFA provider and that’s why I do things differently.
I create an administrator account that doesn’t have MFA enabled and is only to be used during an outage. With Azure AD Premium we can set-up alerting when this account is used to log-in. I typically configure the logging to send an e-mail to an IT mailbox/ticketing system where we will follow-up these sign-ins. We can investigate if this account has been breached or if it was someone of your staff who logged in.
Remember that we excluded our ‘BTG Admins’ group from our Conditional Access policy that enables MFA? This ensures that these account do not have MFA configured.
Creating the account
First of, we create our break the glass administrator account. This account will be used to log into Office365 during an outage.
Fill in the desired name and passwords and keep the following elements in mind:
- Choose your .onmicrosoft.com domain (this will ensure the least amount of problems)
- Configure a long, random generated password
- Provide the account with Global Administrator rights
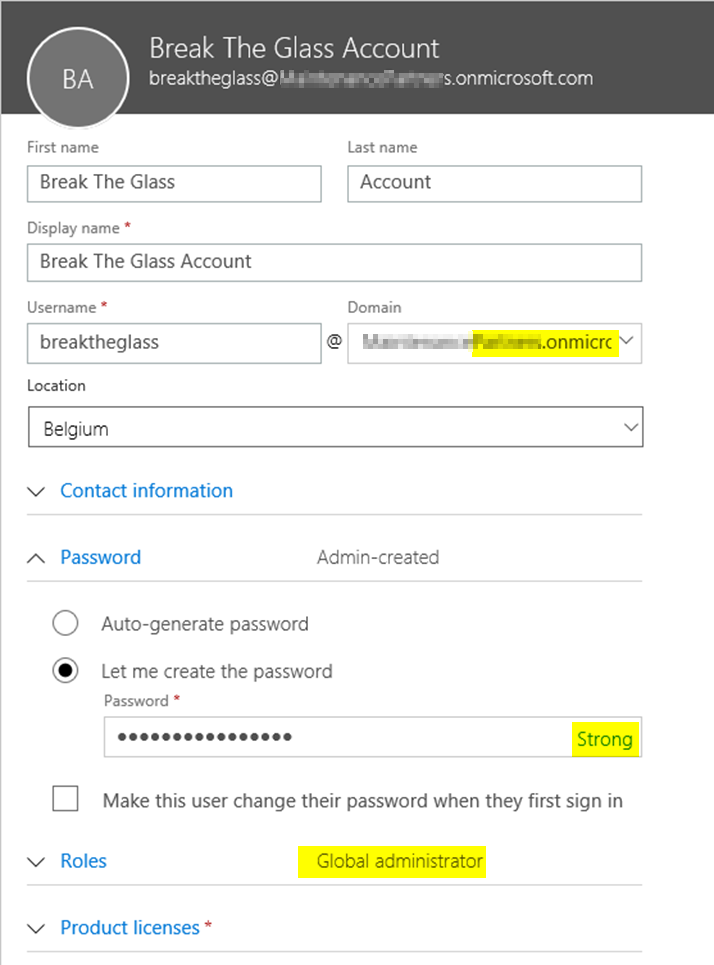
After the account is created, add the account to your ‘BTG Admins’ group.
Set up alerting
To receive alerts of sign-ins we have to configure Azure AD to sends it’s logs to a Log Analytics Workspace, here we will analyse these logs and configure alerts.
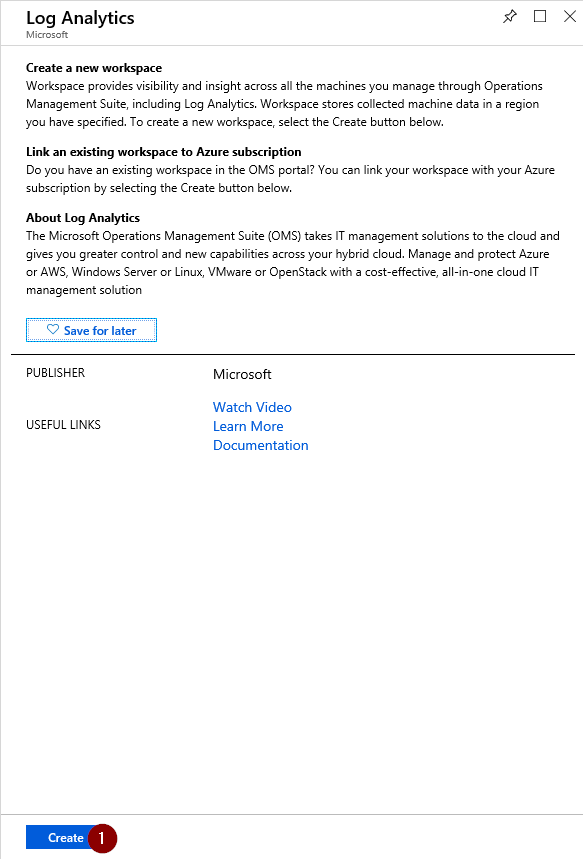
Create a Log Analytics Workspace
First create a Log Analytics Workspaces if you don’t have one yet. Navigate to portal.azure.com, click ‘Create a resource’, search for ‘Log Analytics’ and click ‘Create’.
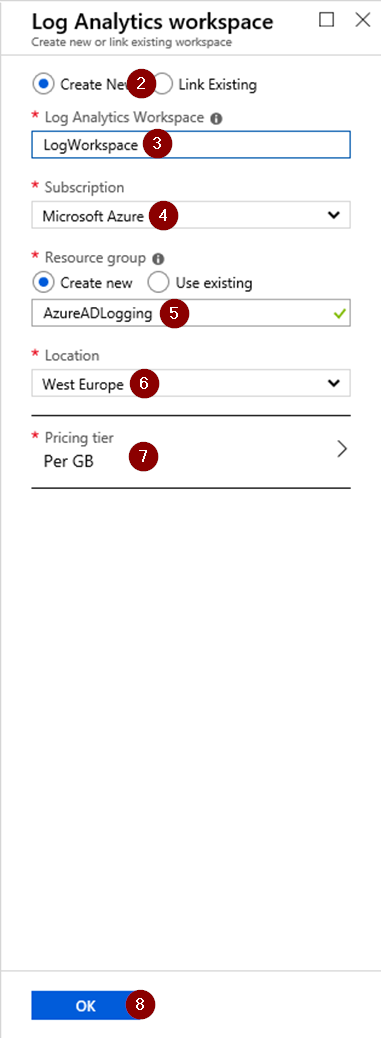
Fill in the required information (name, resource group, region…) to create a new workspace.
Wait a few minutes for the workspace to create. When the workspace has been created, you will see the following screen.

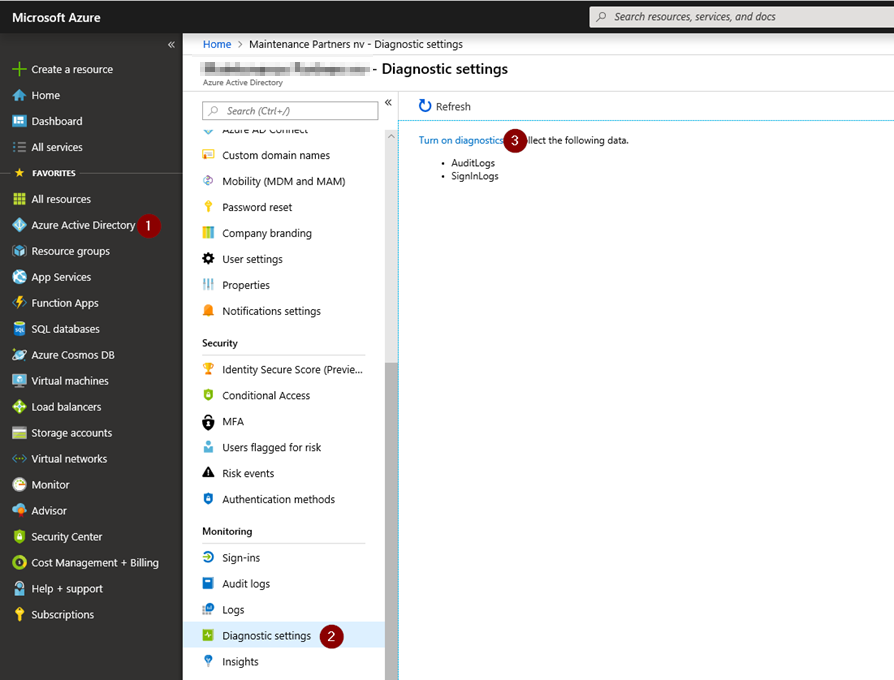
Enable sign-in logging
Audit and sign-in logging isn’t enabled by default and has to be enabled to be able to monitor sign-ins.
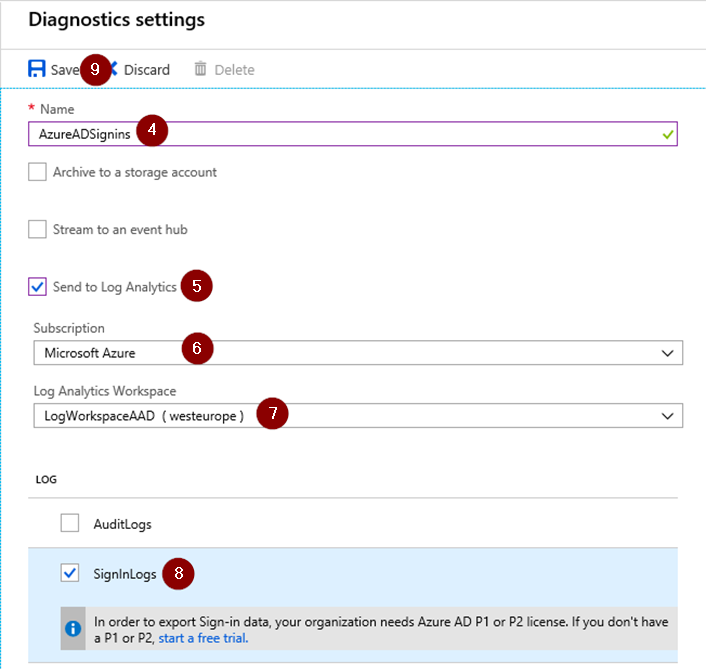
Click on ‘Azure Active Directory’, choose ‘Diagnostic Settings ‘ and turn on Diagnostics logs to collect Audit & SigninLogs.
Fill in the name for the Diagnostic Settings, check the ‘Send to Log Analytics’ Box, choose your current subscription and select your previously created workspace. You can choose which logs to send: Audit or Signin, we only need SignIn Logs at the moment.
Create the alert rule
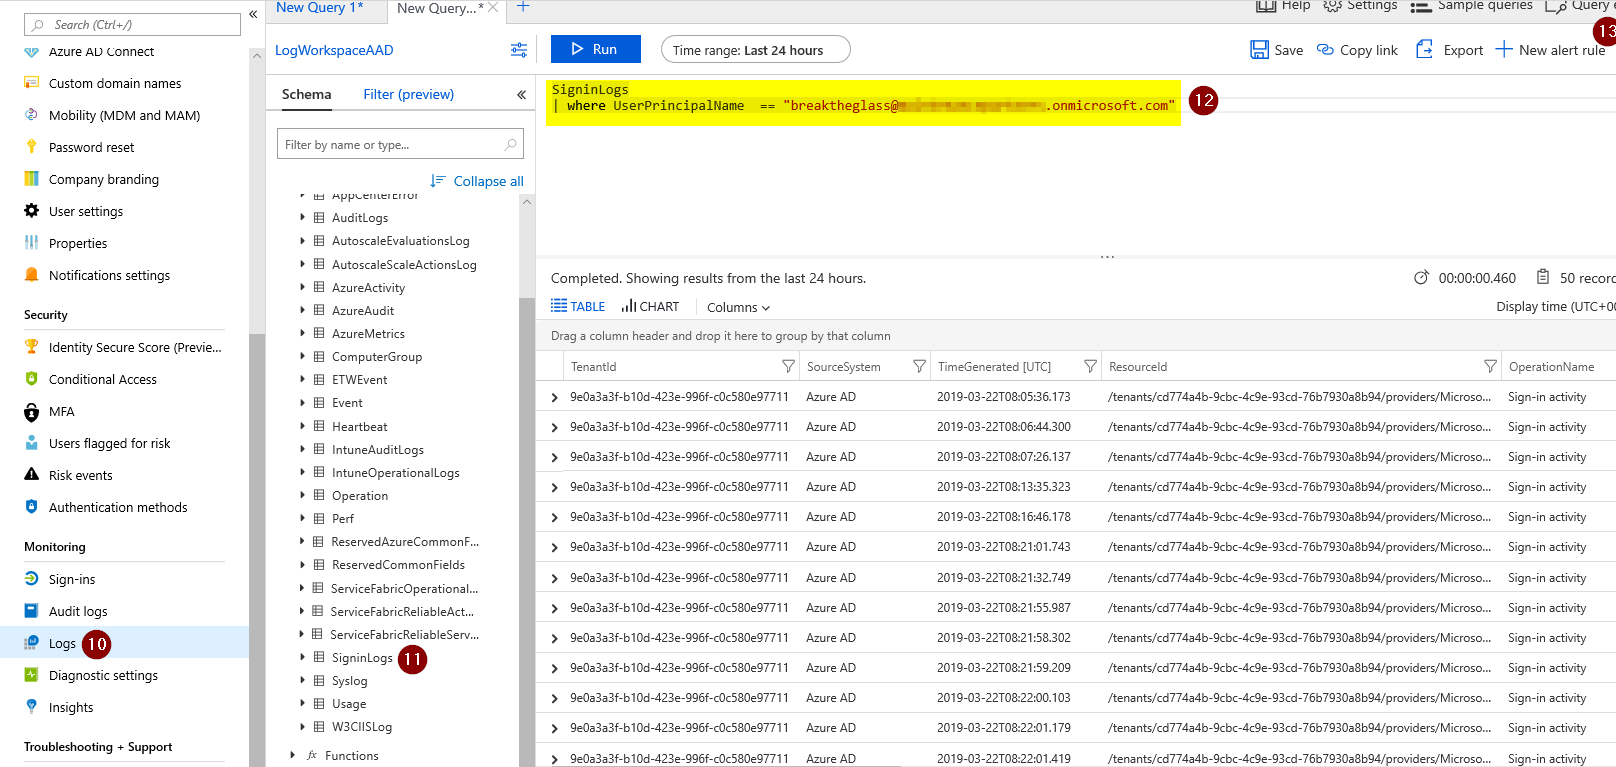
Next up, go to ‘Azure Active Directory’ in Azue, choose ‘Logs’, then select ‘SignInLogs’ (found under ‘LogManagement’) and specify your query.
The syntax should be:
SigninLogs | where UserPrincipalName  == “breaktheglass@domain.onmicrosoft.com"
Where the UPN is the UPN of the account you just created.
When you are configured the query, click ‘New Alert Rule’.
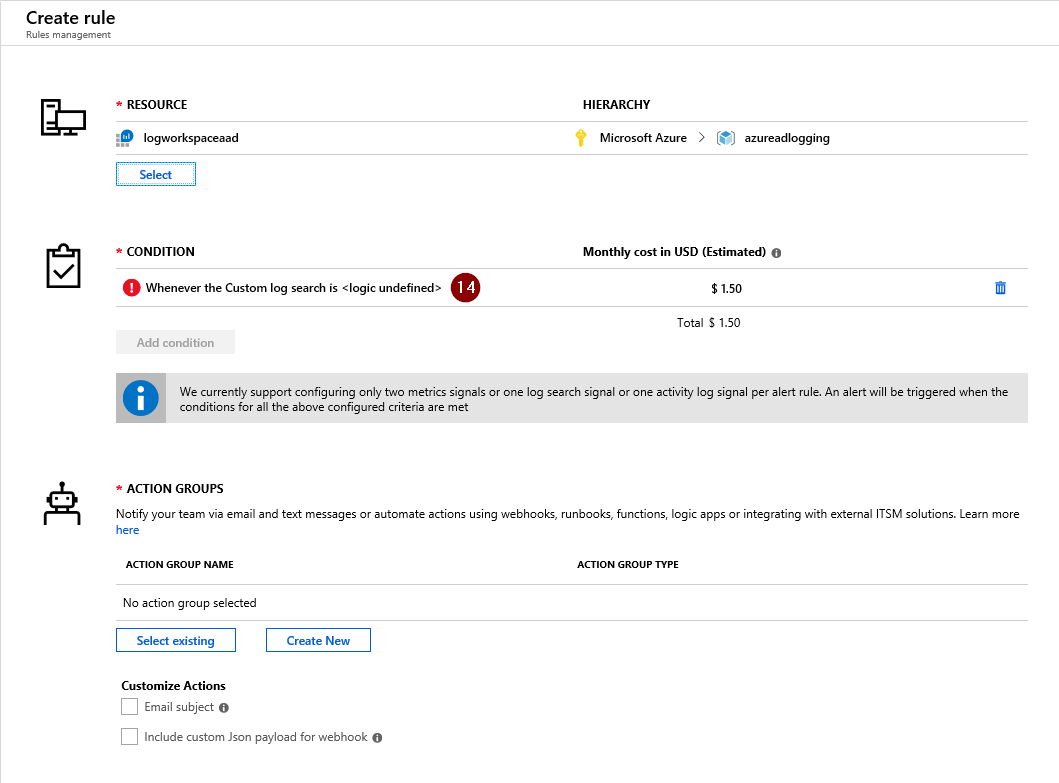
In the ‘Create Alert’ screen, select the condition to customize it.
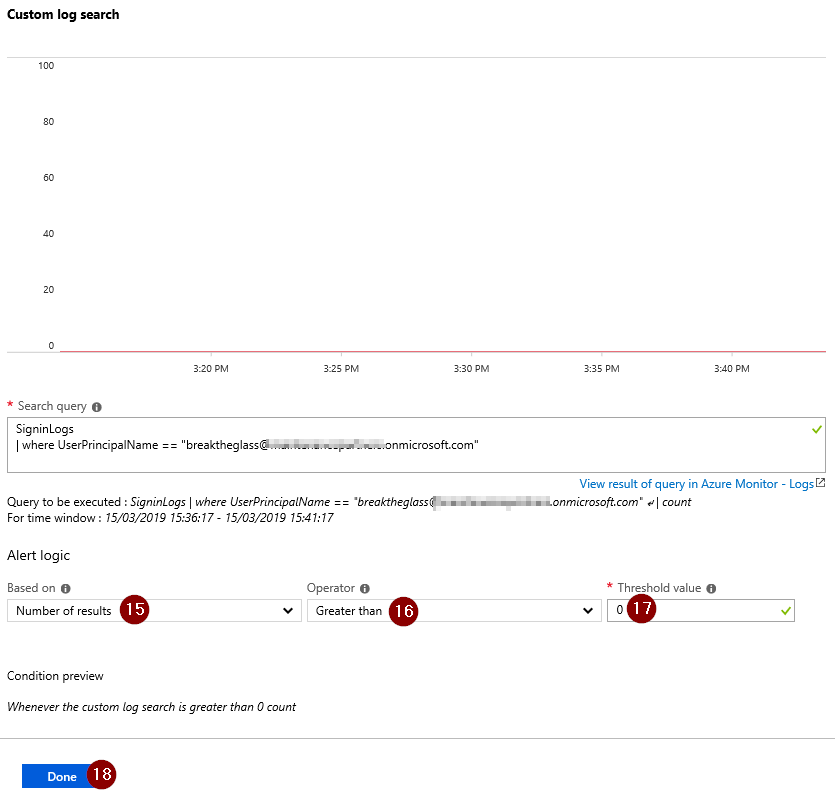
Change the Query Logic to create an alert when the number of logs is greater than 0. To save, click ‘Done’.
Next up, we can create an action group. This action group will define what alerts will be thrown when the condition is met.
To do this, click ‘Create New’.

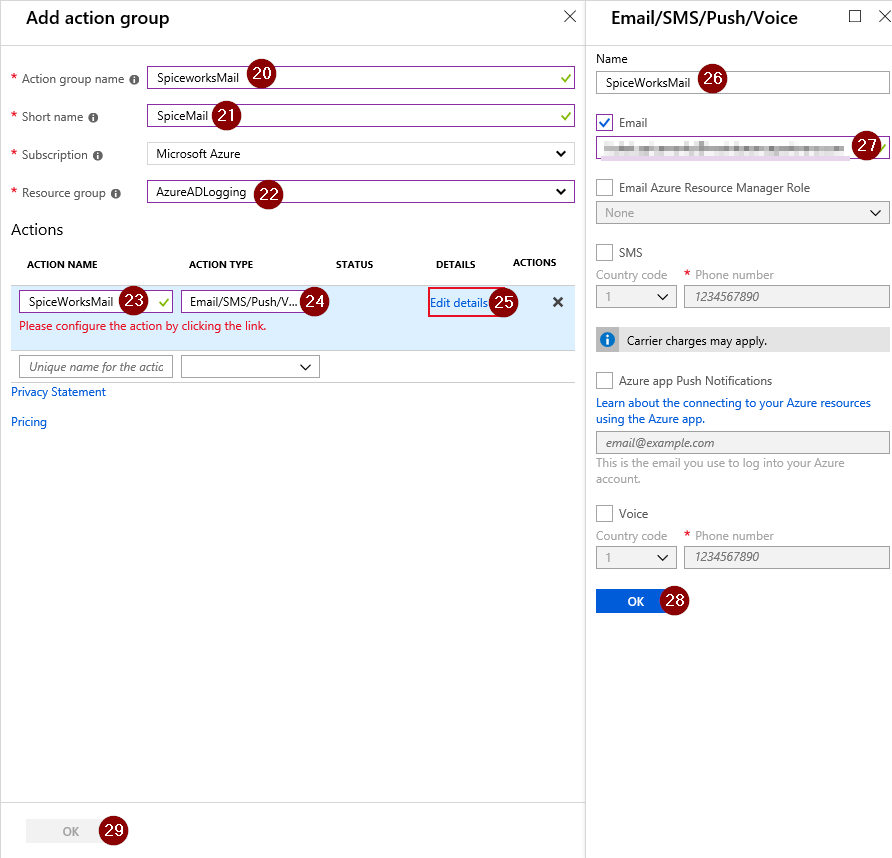
In the next screen, we can configure an action group. Define the name and short name of this group. Then choose the resource group where this Action Group should be saved, I choose to save it in the same resource group as the Log Analytics Workspace.
Create an Action Name and choose ‘Email/SMS/Push/Voicemail’ as action type. After this info is filled in, choose ‘Edit Details’.
A new screen will open, fill in the name and email that should be used. If all the info is filled in, click OK and ‘Done’ afterwards.
We have created an action group, this action group will send an email to the ticketing system/IT mailbox.
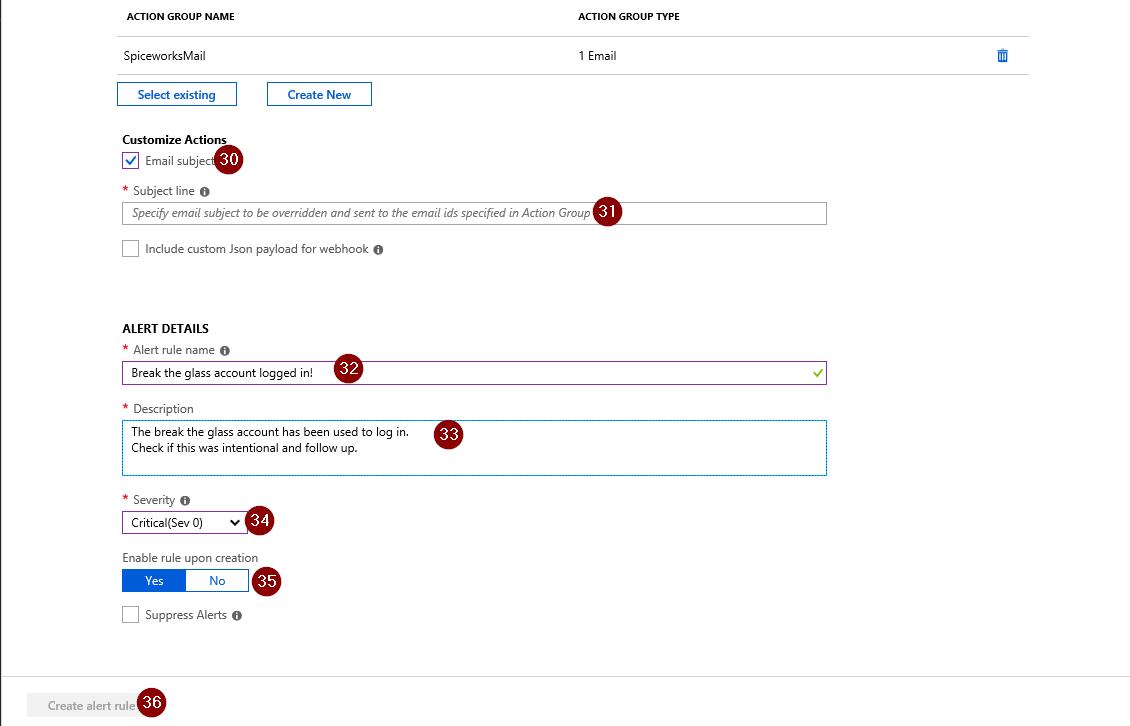
Finally you can choose to customize the alerts with a specific subject Line, alert name, description and severity.
To save the alert rule, make sure ‘Yes’ is selected in the option ‘Enable rule upon creation’ and choose to create the alert rule.
The result
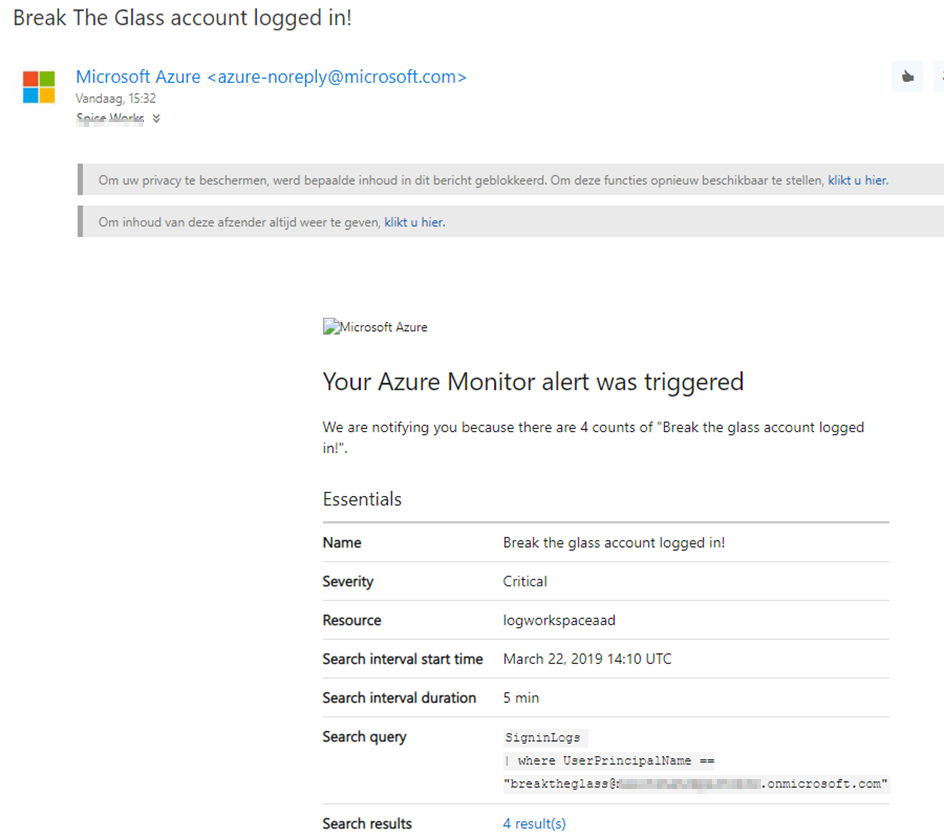
When all of this is configured, you will receive an email each time the account has been used to login.
Without Azure AD Premium
What if you org doesn’t have Azure AD Premium?
Well first off, consider buying one license. You only need one license because you are only monitoring one account. One license only costs you 5,4 euro per user and as this completes your MFA roll-out, I highly recommend it.
If you don’t want to buy the license, I can recommend two things:
- Secure the break the glass account with a different MFA provider
- Create an on-prem users that sync with Azure AD Connect to the cloud and disable the user. When there is an outage, enable the user, let this change sync and log in with the account. After the outage disable the account again. This is a good solution, but be aware that an outage of the MFA outages typically goes hand in hand with an Azure AD outage which could mean your Azure AD Connect stops functioning for a while.
Summary
This was the last blog of the three part series for rolling out Multifactor Authentication in your Microsoft 365 environment. If you have any questions or remarks, feel free to drop a comment or contact me through mail (thijs.lecomte@orbid.be).


I am a 22-year old cloud and automation enthusiast. My main focus is EMS, Powershell and Azure. My scripts can be found through my GitHub account: https://github.com/thijslecomte. I am currently blogging at http://365bythijs.be
Is the setting up and using the Log Analytics Workspace free or do you need to pay monthly usage fee? We have AD P1 premium.
You still have to pay for the log analytics usage.
Thanks for this Thijs. Is it just the MFA related CA policies you would typically exclude the BTG accounts from, or do you do it for all configured policies? In most articles I’ve read generically state that you should exclude these accounts from *all* CA policies, but initial concerns on that relate to those that handle location-based access (thinking high-risk countries) or excluding from legacy authentication policies. That said, if the account isn’t protected by MFA then I don’t suppose there’s a difference on the legacy auth front. Equally, in scenarios where you’re disabling basic auth protocols elsewhere in the tenant config I guess its a moot point anyway 🙂
By the way I notice you don’t mention BTG in part 2 of your guide so fairly sure I know the answer, but would be good to clarify either way for my own sanity!
Thanks