
Setting up Multifactor Authentication the right way – Part two: Blocking Legacy Authentication
Welcome to the second part of my series ‘Setting up Multifactor Authentication the right way’. In part one we have configured MFA through a Conditional Access policy. In this second part we will go over ‘Legacy Authentication’.
What is Legacy Authentication?
The term Legacy Authentication is used when we refer to authentication requests being made with ‘legacy protocols’. These are protocols that use basic authentication. Basic authentication is the old authentication flow, where only one form of authentication is required. This is the predecessor of Modern Authentication, which makes it possible to require multiple forms of authentication.
Because security is of the utmost importance , it is important to switch to modern authentication. One form of authentication simply isn’t enough. Disabling legacy authentication makes sure all of your users use modern authentication and use multiple forms of authentication. Enabling MFA through Conditional Access isn’t enough, because this still allows clients to authenticate with only username and password.
All modern Office apps support the use of Modern Authentication. Office 2016 & 2019 have full support, for Office 2013 some teaks and updates might be required. Outlook for Android/iPhone and the Apple mail client support Modern Authentication.
Identifying users who use legacy authentication
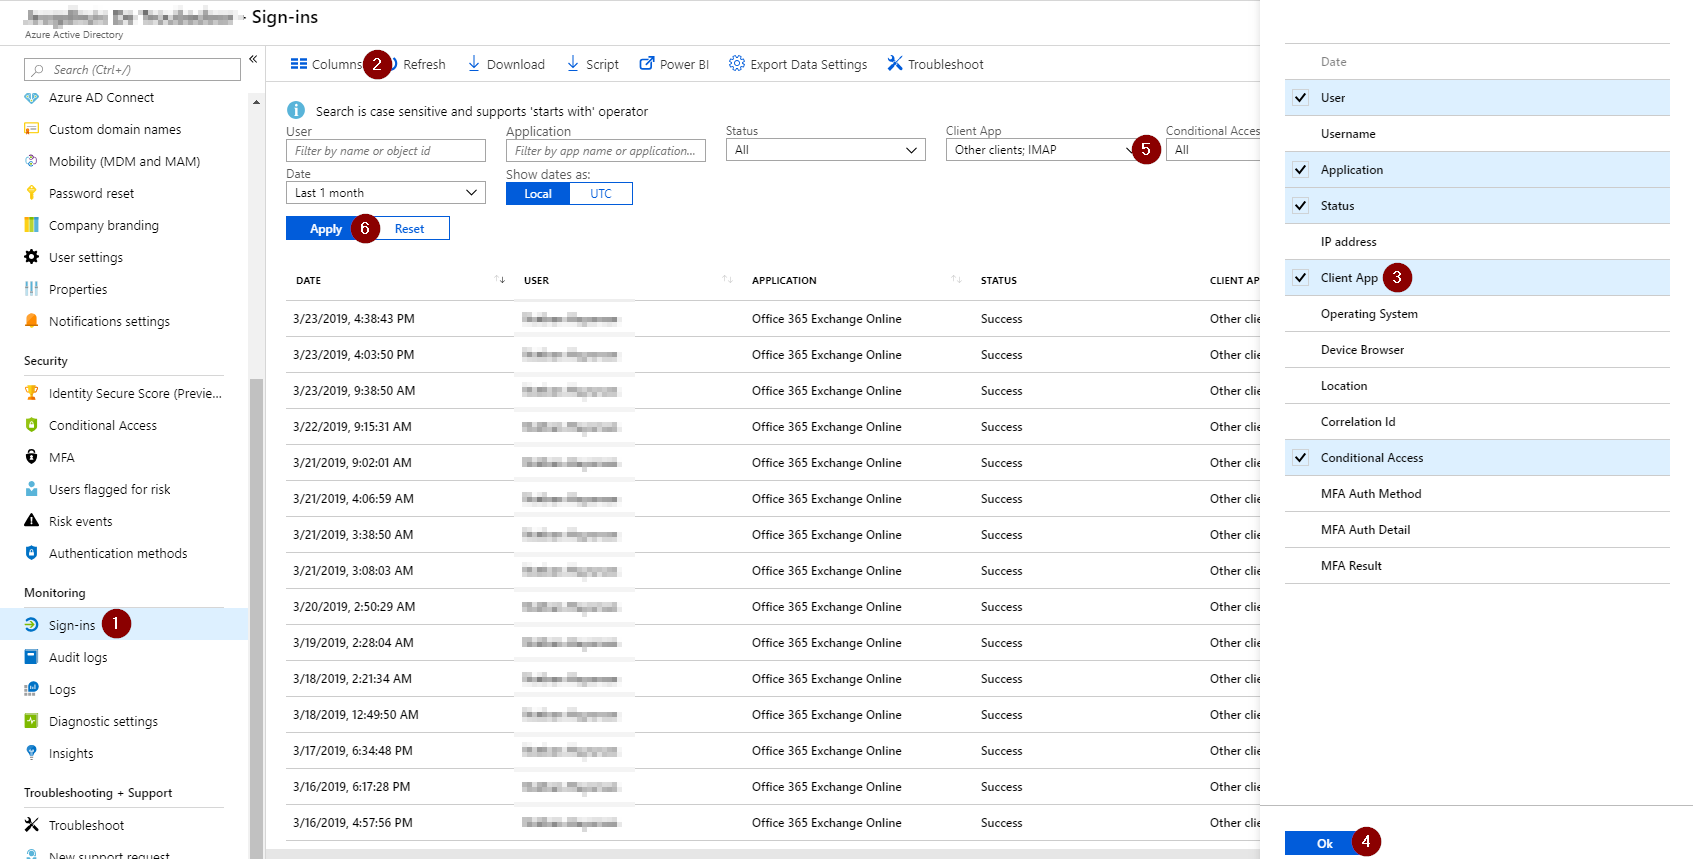
Your first step towards disabling legacy authentication should be to identify users/services that use legacy authentication. This can be done through the Sign-in Monitoring function of Azure AD (this is a Azure AD Premium P1 feature).
Navigate to portal.azure.com, go to Azure Active Directory and scroll down to Sign-ins. Here you will find an overview of all the sign-ins happening in your tenant. You can add the column ‘Client App’ and then filter on the different ‘Other Clients’ (these are the legacy protocols). Use this overview to identify the users that still use legacy authentication and try to switch them to Modern Authentication.
Creating the policy
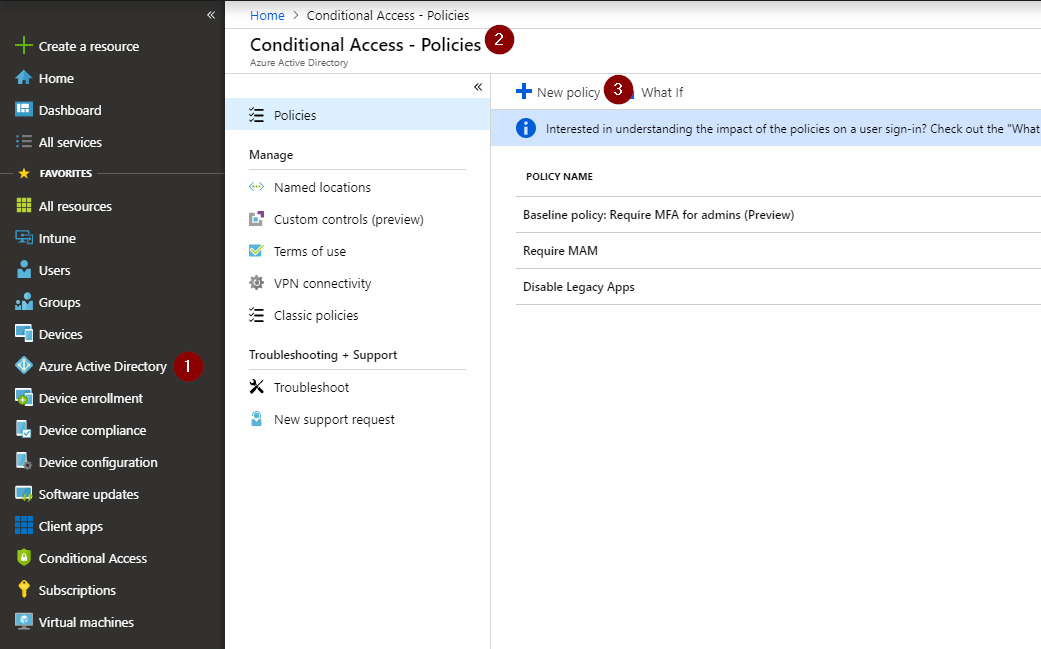
Blocking legacy authentication for all Microsoft 365 services is best done through a Conditional Access Policy.
Navigate to portal.azure.com, select ‘Azure Active Directory’ in the left side menu, choose ‘Conditional Access’ and then click ‘New Policy’. To start the creation of a new policy.
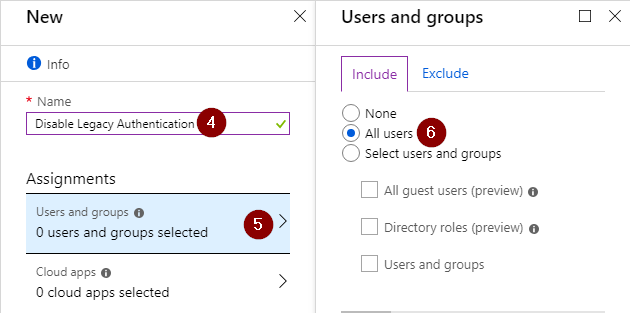
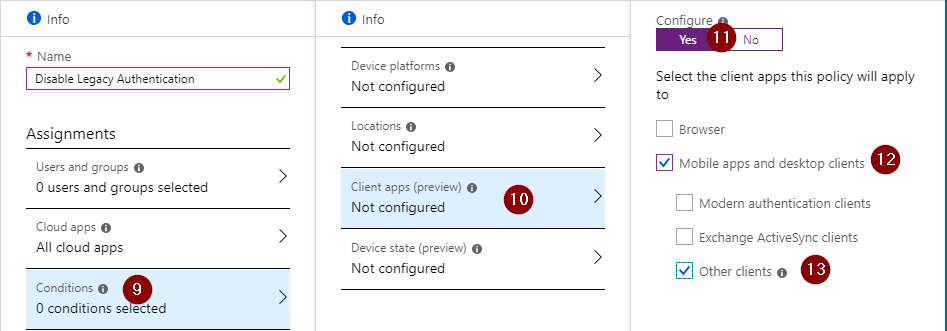
Fill in your desired policy name and select ‘Users and group’ and choose ‘All Users’
Reminder: be sure to exclude any service accounts that use a legacy protocol (like POP,IMAP…). If you have any of these accounts it is recommended to lock these down as much as possible. If this account is only used internally, you can create a policy that blocks this account from logging in outside of your corporate network.
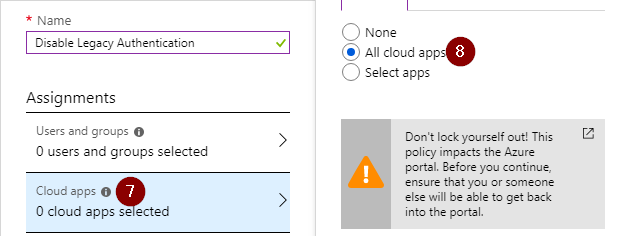
We want to block access for legacy clients to all cloud apps, so select ‘All Cloud apps’.
Next up, select ‘Conditions’, ‘Client apps’, Select ‘yes’ and check the ‘Mobile apps and desktop clients’ and ‘Other clients’ boxes. This is the setting that will block all the legacy protocols.
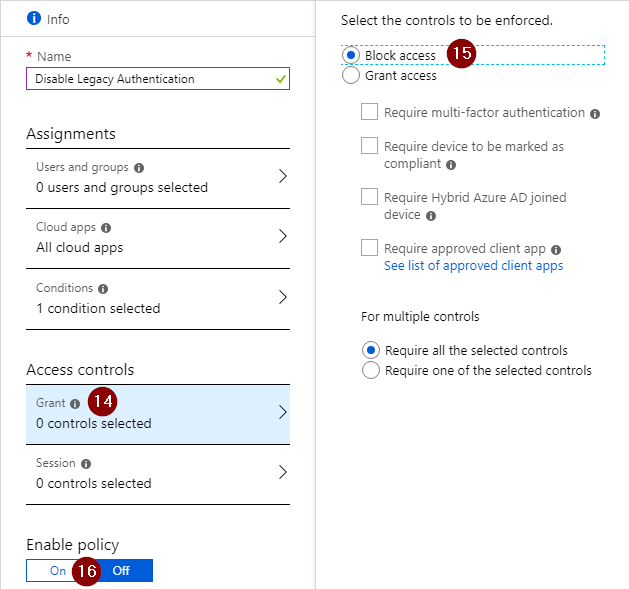
The last step is to select ‘Block access’ in the controls configuration screen, enable the policy and save it.
Without Conditional Access
If you don’t have the ability to use Conditional Access, you can block legacy authentication on Exchange Online itself. This will block all legacy authentication attempts to Exchange Online, but will not protect your whole Microsoft 365 environment. Check out the following blog for more information.
Stay tuned for the third and last part of this series, Configuring a break the glass administrator.


I am a 22-year old cloud and automation enthusiast. My main focus is EMS, Powershell and Azure. My scripts can be found through my GitHub account: https://github.com/thijslecomte. I am currently blogging at http://365bythijs.be
One comment on “Setting up Multifactor Authentication the right way – Part two: Blocking Legacy Authentication”