
YeaLink RoomPanel
The Yealink RoomPanel is one of the dedicated Microsoft Teams devices for displaying meeting details scheduled via Teams or Outlook 365. Moreover, the panel is also enabled for reserving an available room on the spot and indicating current room status.
In this article, we will go over the configuration for both the device and the back-end.
Unboxing
For the unboxing and standard configuration of the panel, you can watch my unboxing video on YouTube.
Microsoft 365
Prerequisites
For the YeaLink RoomPanel, you need some prerequisites to make fully use of all features on the device:
- An Office 365 Resource mailbox for the meeting room.
- The Resource Mailbox needs to be licensed with either:
- Microsoft Teams Rooms Standard
- Microsoft Teams Rooms Premium
- The Resource Mailbox needs to be enable for sign in.
Note: You can use other licenses for the account. However, I do not advice this. Using E1 or Business Basic gives you the basic Teams functionalities, but there is no guarantee all features are available when using the device. The Teams Rooms license contains Phone System and Intune. E1 or Business Basic don’t have these features.
Create the resource account
If you don’t have a resource mailbox yet, you first need to create this. This can be done via the Exchange Online Control Panel or via the Exchange Online PowerShell module.
New-Mailbox -Name “Orbid365 Meeting Room” -Alias Orbid365Room -Room -EnableRoomMailboxAccount $true -MicrosoftOnlineServicesID vergaderzaal.orbid365@Orbid365.be -RoomMailboxPassword (ConvertTo-SecureString -String ‘P@$$W0rd5959’ -AsPlainText -Force)
Next, you adjust the calendar processing so it automatically accept meetings.
Set-CalendarProcessing -Identity “Orbid365 Meeting Room” -AutomateProcessing AutoAccept -AddOrganizerToSubject $false -DeleteComments $false -DeleteSubject $false -RemovePrivateProperty $false
If you do not want the password to expire, use the following syntax:
Set-MsolUser -UserPrincipalName “vergaderzaal.orbid365@orbid365.be” -PasswordNeverExpires $true
Lastly, license the user with the right licenses.
Enable the account for Teams
After creating the resource mailbox, you need to enable the account for Teams Meeting Room devices. This needs to be done via the Teams PowerShell Module.
Import-Module MicrosoftTeams
$credential = Get-Credential
Connect-MicrosoftTeams -Credential $credential
Firstly, get the RegistrarPool information from the account.
Get-CsOnlineUser -Identity “vergaderzaal.orbid365@orbid365.be” | Select -Expand RegistrarPool
Use this information to compose the next command. This command enables the account for Teams.
Enable-CsMeetingRoom -Identity “vergaderzaal.orbid365@orbid365.be” -RegistrarPool “sippoolbl20a04.infra.lync.com” -SipAddressType EmailAddress
Managing your device
You manage your Teams devices via the Teams Control Panel. Under Teams Devices, you find a list of all your registered Devices. To find the RoomPanel, you click on “Panels”.
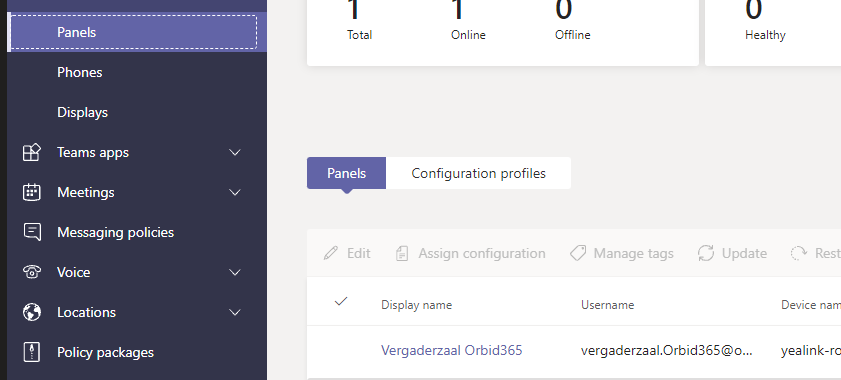
You see the status, device name, IP and username of the device.
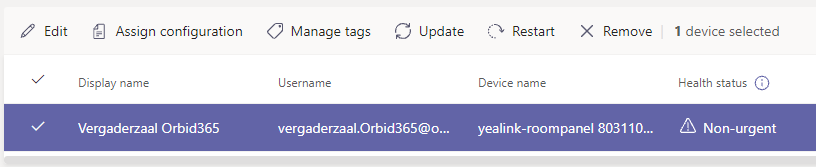
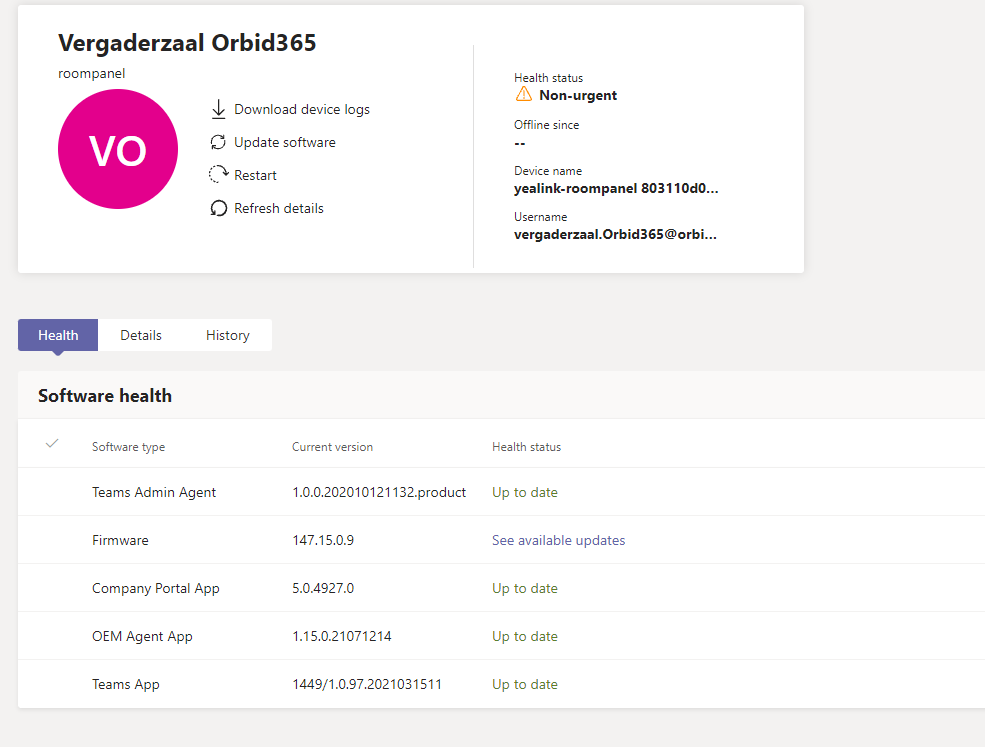
To execute certain actions, click on the display name or click Edit. A list of possible actions appear. The most important actions you can execute are:
- Push Firmware and Application updates to keep your device up-to-date.
- Restart the device.
- Download logs for troubleshooting.
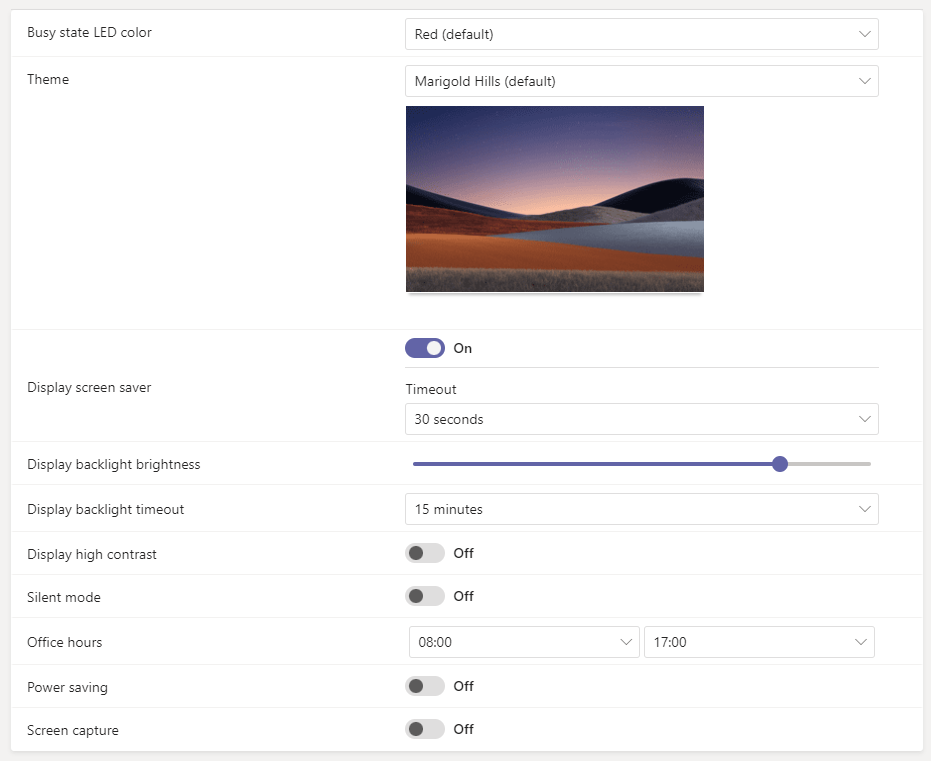
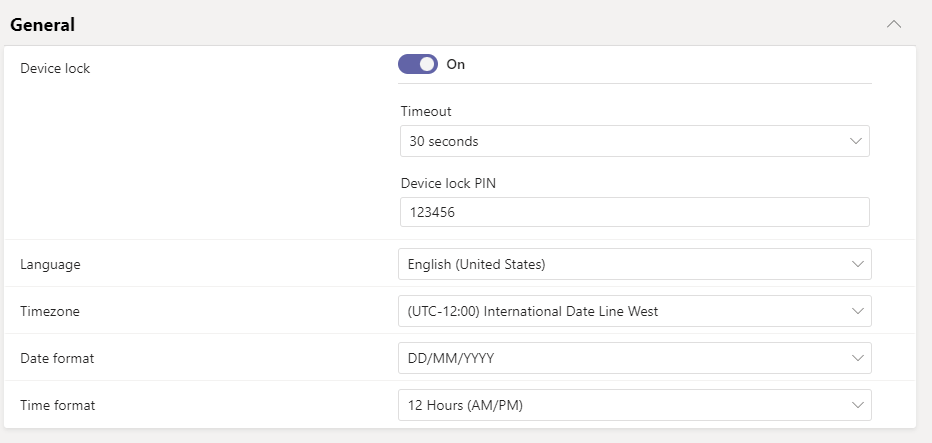
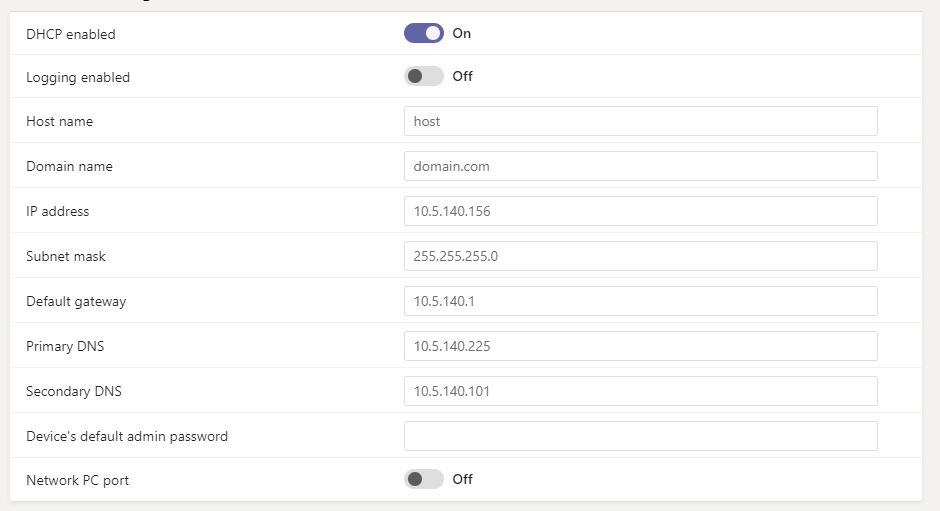
Finally, an important feature is pushing configuration profiles. This allows you to manage all your panels in a streamlined way. First, you need to create a configuration profile. You see the following configurations for your Panel:
Finally, as soon as you created the configuration profile, assign it to the panel by using “assign configuration”. The profile is pushed in a matter of minutes.
Technical Specifications
To end this article, I want to give you the specifications of this device.
Basic
Operating System: Android 9
Display
Size: 8″ LCD Panel (16:10)
Resolution: 1280×800
Contrast: 1000:1
Viewing Angle(H/V): ±80°/±80°
10 points capacitive multi-touch
Anti-fingerprint Coating
Proximity Sensor: Yes
Ambient Light Sensor: Yes
Connectivity
Ethernet: 1 x Fast ethernet port (10/100Mbps)
Wi-Fi: 2×2 MIMO, 802.11a/b/g/n/ac
Bluetooth: 5.0
RFID/NFC: 13.56MHz
USB Port: 1 x USB-C port
Button: 1 x Reset pin hole
Audio
Microphone: 2 x Array Microphones
Speaker: 2 x 1 Watt Speakers
Power Supply
Power over Ethernet (IEEE 802.3af)
12V Power Adapter
Mounting Options
Surface mount for 2-gang US electrical box
20° tilt mount kit for wall or glass
Flush mount kit for wall or glass
Dimensions
Display size (mm): 209 x 146 (8.23” x 4.06”)
Weight: 0.53kg (1.168 lb)


I’m a 27 year-old Belgian working for Orbid NV as Senior System Engineer. I’m a member of the cloud Team where I focus on everything from Teams PSTN and Exchange to AVD & Intune.
We are implementing these and are unable to schedule/book future times directly on panel itself. Is this even an option?
Hi,
Does your panel display the name of the meeting? Even though I have enabled the feature, it only displays the name of the person who created the meeting.
Thanks.