
How to make a golden image in Azure
In this guide, we will explain how to make a golden image in Azure. We do this by creating a virtual machine in the Azure portal with a chosen image and edit this. After that we capture that image and save it in our Azure resources. This image can then be used to create multiple virtual machines and comes in quite handy when you need to, for example, deploy a Windows Virtual Desktop environment with multiple VMs.
Make sure to also check out our other blogs around Windows Virtual Desktop here
Requirements
To make a golden image you need following:
- An Azure Subscription
- If not using a public IP address, a VPN gateway or Bastion setup for your virtual machine
- A resource group
Create virtual machine
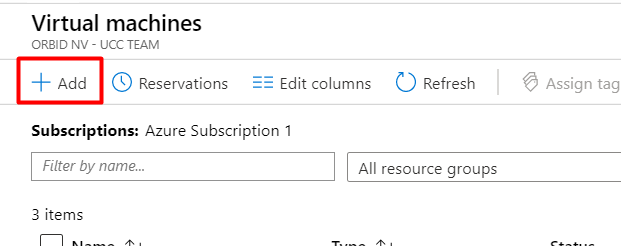
The first thing we need to do, is to create a virtual machine via the Azure portal. In the Azure portal we go to Virtual Machines and add a new one.
Here we can choose the settings as you want them to be. Important is to choose which image you are going to use to be the golden image. In this example I’m using the Windows 10 Enterprise multi-session as an image because I want to use this to deploy to all my virtual machines.
For sizing, I recommend using B2ms to work smoothly. If you also want to use a public IP address, enable the RDP gate as well.

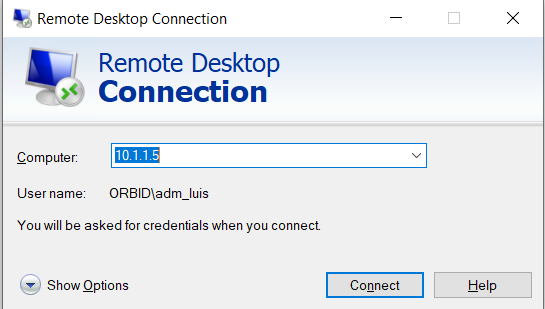
If the machine is created, we can connect to it via RDP.
Sysprep
After login as administrator, you can start changing and installing everything that you want the image to be. This can be changing the language, adding keyboards, installing programs,…
When you are done with all your changes in de VM, we can now prepare it to capture the image. First you open ‘cmd’ as Administrator. After that, you need to navigate to %windir%\system32\sysprep with the command: cd %windir%/system32/sysprep.
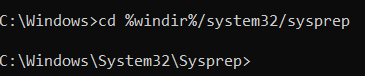
Finally, type in sysprep.exe and press enter. This will open the System Preparation Tool. In System Cleanup Action, we choose Enter System Out-of-Box Experience (OOBE) with Generalize checked. For Shutdown Options we choose Shutdown.

After pressing OK, the system will begin preparing the virtual machine and will shut it down after a while. Make sure that the virtual machine is also stopped in the Azure portal before continuing.
Capture image
Now it’s time to capture the image and store it in our resource group.
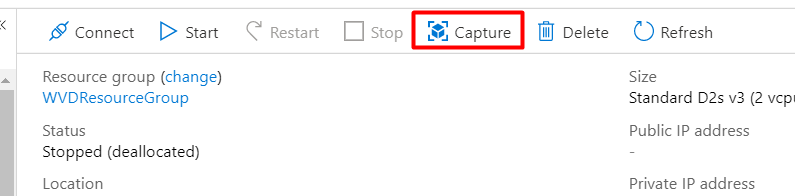
When the virtual machine stops, navigate to the virtual machine in Azure and click on Capture.
Choose the name for your image and in which resource group you want your image to be. Since the virtual machine will be unusable after capturing the image, you can check Automatically delete this virtual machine after creating the image.

After creating the image, you will see that this image has been created and stored in the resource group.
Cleanup
Now that we have successfully created our image, the only thing we need to do is to delete the resources that were created with the virtual machine. These are the network interface, OS disk and if you’ve used a public IP address, this one as well.
To delete them, navigate to your resources group in the Azure portal, check these resources and click Delete.


I have been actively working as an intern in Orbid. They gave me the opportunity to test out a new technology from Microsoft called Windows Virtual Desktop. Since then, I have acquired a lot of interest in cloud solutions.
Can you share the image that was created between subscriptions?