
Combining Microsoft Forms Pro and Microsoft Power Automate
By combining Microsoft Forms Pro with Power Automate it becomes possible to send personalized surveys to employees and clients. The answers of these surveys will be saved in the Common Data Services but with flow you can send them anywhere you want. Moreover with Power Automate sending reminders becomes possible. Not familiar yet with Power Automate check out this link https://www.orbid.be/software/microsoft-power-automate.
In this post, we will technically describe how we can send Forms Pro survey with Power Automate. The responses of these surveys will be saved in Excel. Lastly we will explain how reminders can be sent out.
Prerequisites
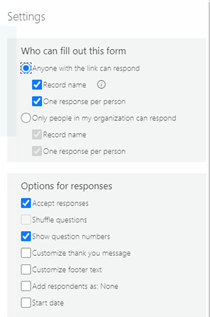
- Microsoft Form Pro survey with variables (Add extra variable SPID) and possibly branching rules set. The settings that were used for the survey in this example can be seen in the screenshot underneath
- Access to premium connectors of Power Automate
- Access to premium connectors of Power Automate
As a first step we will need a SharePoint list where we will store all the needed information like the values of the variables and the recipients of the survey.
Secondly, we will need an Excel file that we save in a SharePoint Document Library or on an Onedrive. In the excel file we need a table where the columns represent the data we want to save.
Now we can start with our first flow that will send out the survey’s
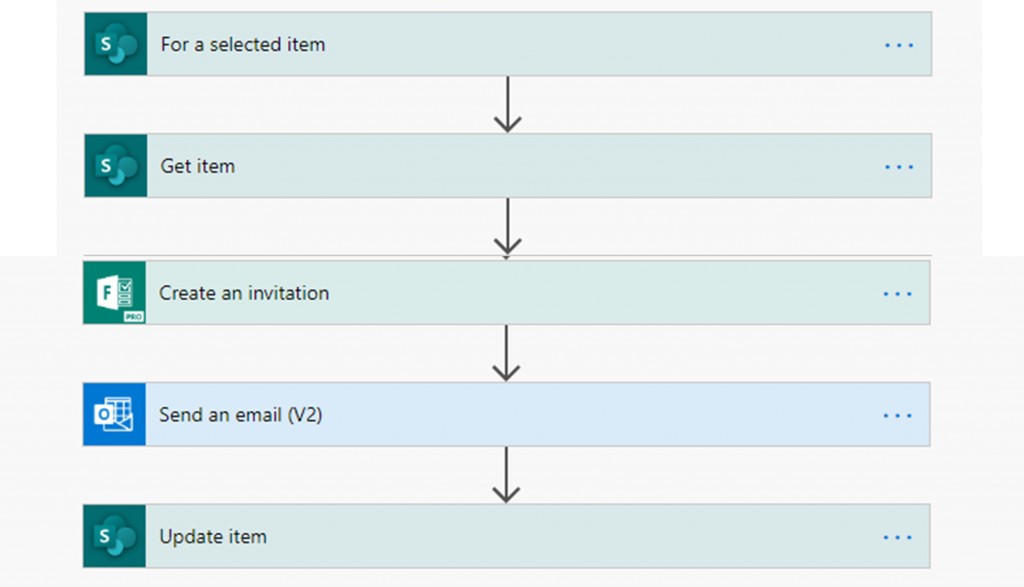
Picture 1: Full First Flow
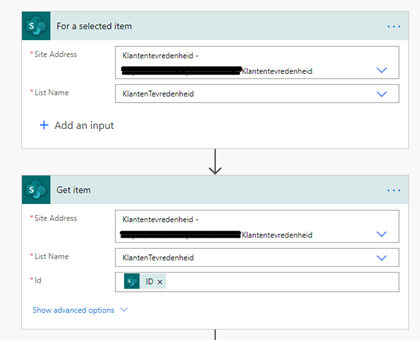
Picture 2: Step 1&2 First flow
This flow will be started manually by the user on a SharePoint Item but can be triggered automatically when a SharePoint item is made. Make sure that you know this in advance because changing the trigger will remove any of the dynamic content used from that trigger in following steps.
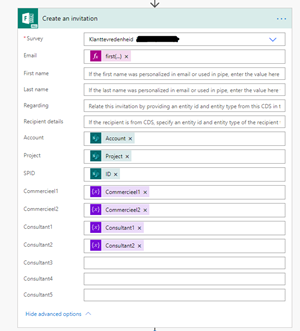
Picture 3: Step 3 First flow
The “create an invitation” is the most important action in this flow. This action makes sure the right survey is sent with the variables filled in. However, we will have to provide one email address. This email address will be seen as the person who should fill in the survey. However, the problem with this is that if this person sends this link to a colleague, which will be able to fill in the survey, we will not know that this colleague filled it in. Forms Pro still thinks that the person who filled it in is the email address that we filled in in the Flow action.
We also made an extra variable SPID which will contain the unique ID to the SharePoint Item which we will fill in in the action above
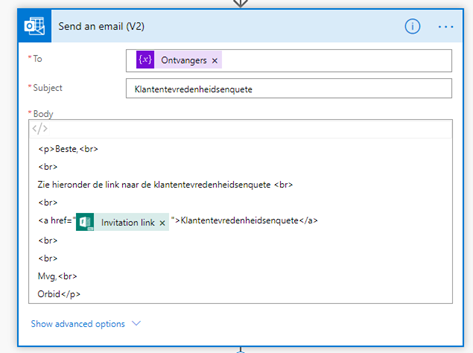
Picture 4: Step 4 First flow
The invitation link can be sent with the “Send An Email” Action. Take into account what we mentioned earlier when this email will be sent to multiple persons. In the last action, we saved the invitation link in the SharePoint Item. This will be later used to send out reminders.
The next flow will manage the responses coming in from all the Microsoft Forms Pro survey’s
Picture 5: Full Second flow Part 1
Picture 6: Full Second flow Part 2

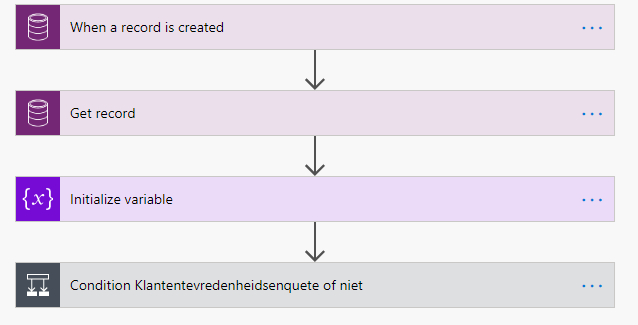
Picture 7: Step 1&2 Second flow

Picture 8: Step 3 Second flow
This flow is triggered when a record is made in the Common Data Service(CDS). The Entity Name will be the same for each tenant unless Microsoft themselves change the Name. In the second step, we will get the survey’s name that is connected with these answers. The reason is that all the answers for all the Forms Pro Survey’s are being stored in the same table. In this case, we will only filter out the survey’s from the survey “Klantenttevredenheid”. However, when more different surveys are made we can extend the flow to also make the appropriate actions for the other survey’s
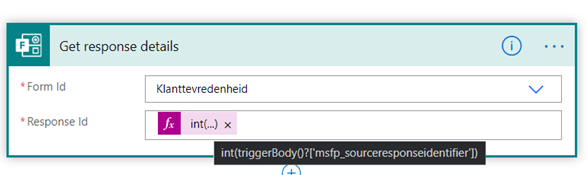
Picture 9: Step 4 Second flow
In the trigger, we will find the response id. This will be used to get the answers from that survey.
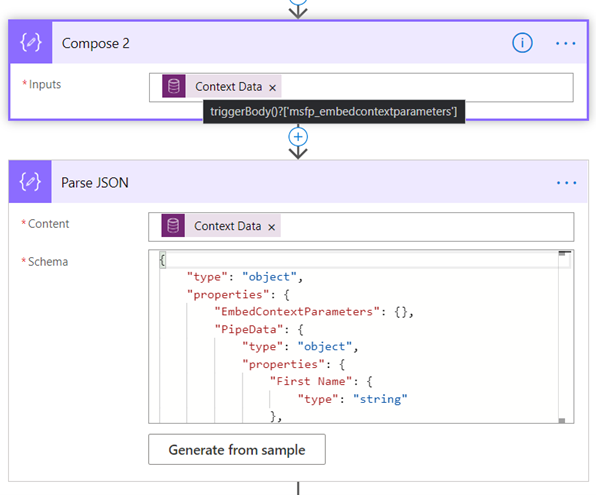
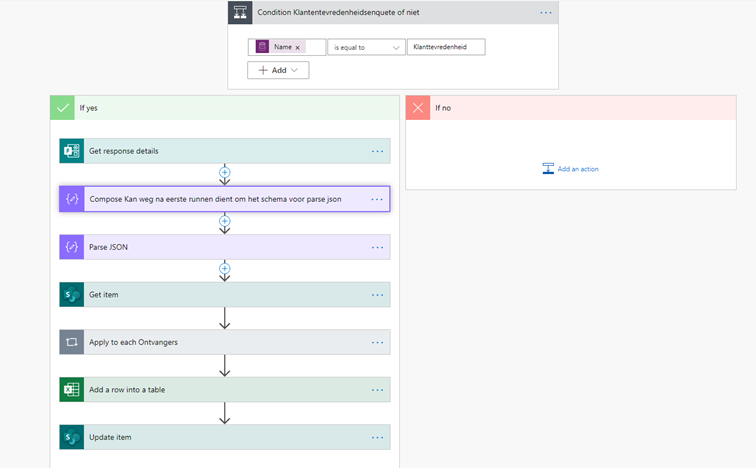
Picture 10: Step 5 & 6 Second flow
The data that we are getting from the trigger can also be made more accessible by a “Parse JSON”. The first compose will only be used once. When we run the flow for the first time we can copy the outputs from this action in the run history and use these to Generate the Schema from the Parse Json with the functionality Generate From Sample.
Because we cleaned up the date with the Parse JSON action we can easily get the value for the variable SPID which will be used to retrieve the connected SharePoint Item.
At this moment we have all the possible data collected about this survey response. We will save this information for easy access in an Excel File. In the last step, we update the SharePoint Item and save any necessary additional info in the SharePoint Item (Answer Date, Response id).
The data from the excel file can be coupled with PowerBI to analyse the data received. (https://powerbi.microsoft.com/en-us/)
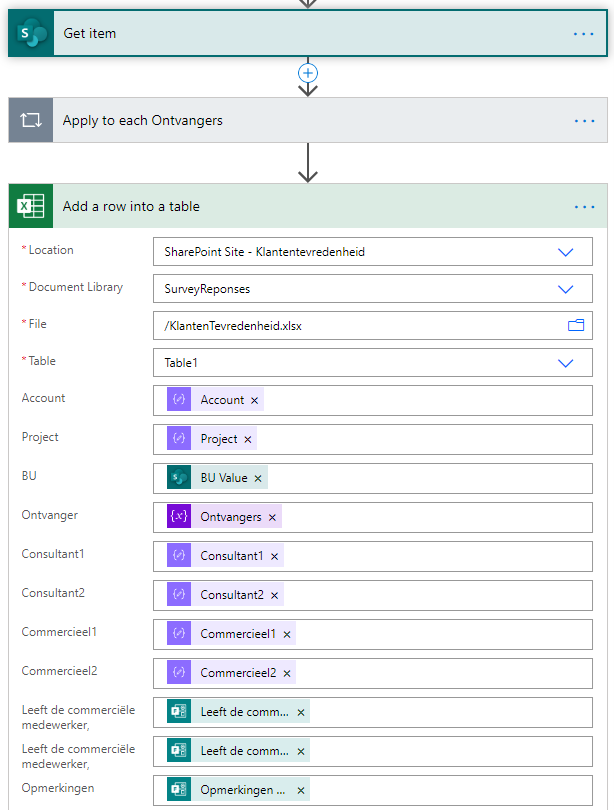
Picture 11 : Step 7 & 8 & 9 Second flow
The last flow will send out email reminders. This is a very simple flow that will use the invitation link that we save in the SharePoint Item in the first flow. The flow is again manually being started in this case but can easily follow a schedule and send out reminders automatically after x weeks.
This flow gets the necessary information from the SharePoint Item and sends out an email with the invitation link embedded in it to the correct recipients. After this, it will update the SharePoint item, in this case, the date when the survey was last send out.
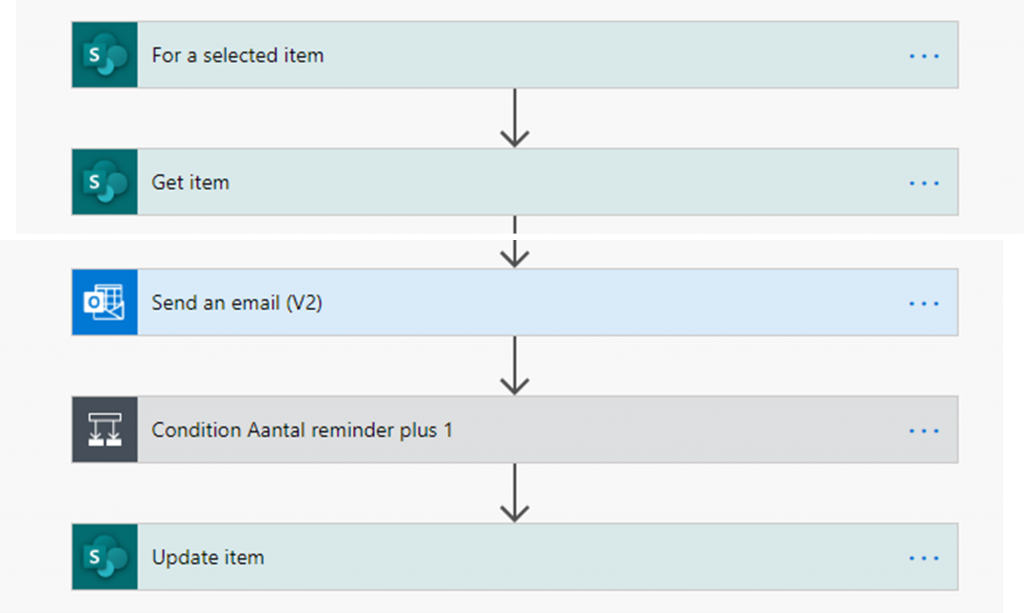
Picture 12: Full Third Flow
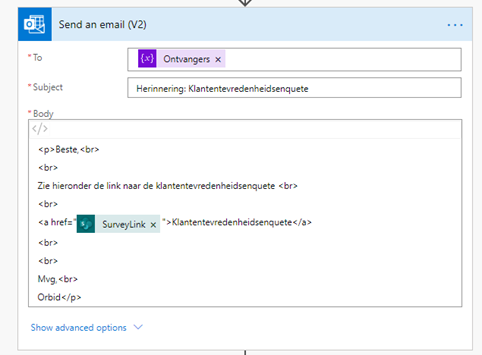
Picture 13: Step 3 Third Flow


Business Analyst in Orbid since 2019. Skilled in Power Platform (Power Automate, PowerBi, PowerApps) and Sharepoint